
This guide explains easy ways to check Ubuntu version using the command line and the graphical interface. When you log in to an Ubuntu system for the first time, it’s a good idea to check which Ubuntu version is installed.
Ubuntu releases a new version every 6 months. LTS (Long Term Support) versions are released every 2 years and are supported for 5 years. Regular (non-LTS) versions are supported for 9 months.
Check Ubuntu Version Using the Command Line
You can use several simple commands to find your Ubuntu version.
1. Using lsb_release (Recommended)
This is the best and most reliable method.
Steps:
- Open the terminal (Ctrl + Alt + T)
- Run the command:
lsb_release -a
Example output:
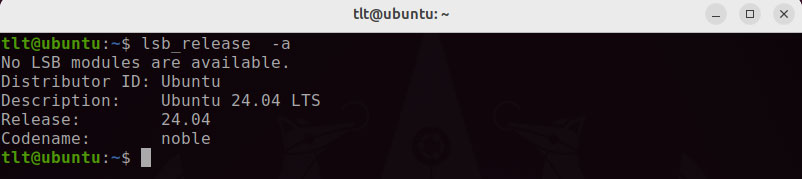
Your Ubuntu version is shown in the Description line.
To show only the version:
lsb_release -d
2. Using /etc/issue
This file contains basic system information.
Command:
cat /etc/issue
Example output:

3. Using /etc/os-release
This method works on Ubuntu 16.04 and newer.
Command:
cat /etc/os-release
Example output:
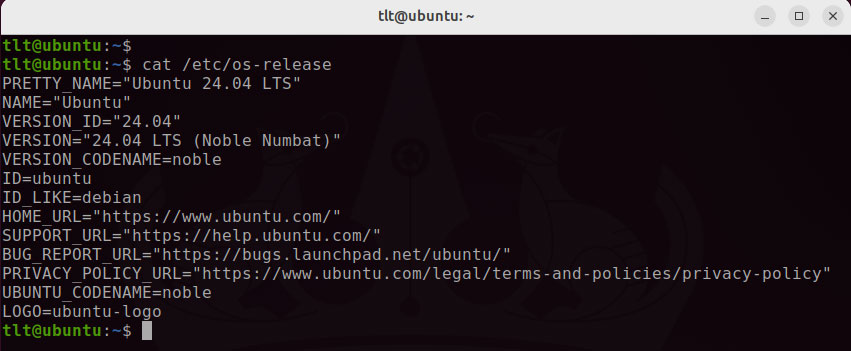
Look for VERSION or PRETTY_NAME.
4. Using hostnamectl
This command also works on Ubuntu 16.04 and newer.
Command:
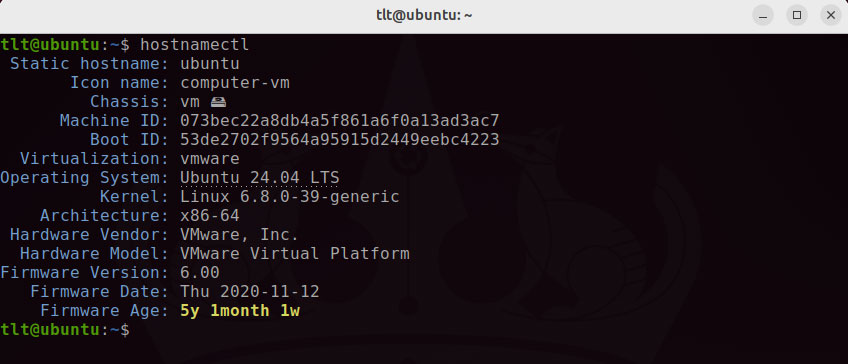
hostnamectl
Example output:
Check Ubuntu Version Using GUI (Desktop)
If you are using Ubuntu with GNOME desktop:
Steps:
- Open Settings
- Click on Details
Your Ubuntu version will be displayed under the Ubuntu logo
Conclusion
We have shown you how to find the version of Ubuntu installed on your system. For more information on Ubuntu releases visit the Ubuntu Releases page.
Feel free to leave a comment if you have any questions.