PuTTY is the de facto standard used to connect to Linux devices from Windows. The best way to use PuTTY is with secure shell (SSH) keys. People prefer to use PuTTY with SSH keys so that they don’t have to remember their SSH password. Using PuTTY enables users to use stronger passwords that prevent password compromises resulting from brute force attacks. In this guide, we’ll walk through the steps on how to create SSH keys with PuTTY on Windows
Generate SSH Keys with PuTTY
Passwords are sometimes easily compromised, such as in brute-force attacks. Also, security best practices dictate using different passwords for each separate login. By using SSH keys, not only do you have one less password to remember, it’s done securely.
Generate a public/private SSH key pair.
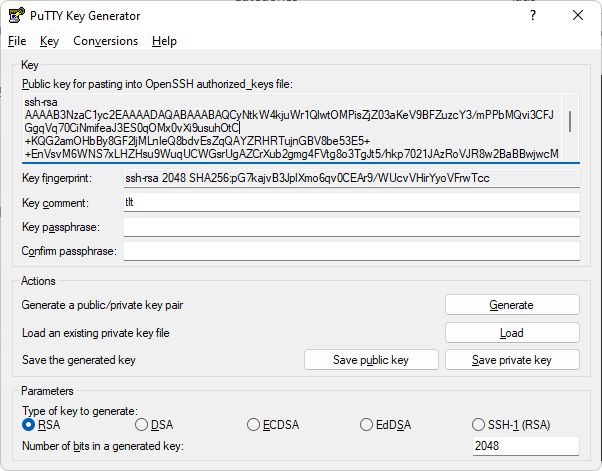
Use PuTTYgen to create/generate a public/private SSH key pair. Simply double-click on the executable that you downloaded earlier (puttygen.exe). Under the Type of key to generate, the default of RSA (the first option, which is the option for SSH-2 RSA) and 2048 are fine. Using SSH-1 RSA is not recommended, because it is less secure. Click the Generate button. Move the cursor around in the blank area to generate a random SSH key.

Click Save private key. This time, the name has to end with .ppk. So, for example, xxxx.ppk.
Copying Your SSH Key to the Server
1. Copy the public key from the PuTTYgen window.
2. Save the public key on the server

Now, you should login to your server (if you’re not still logged in from before). You’ll still be using the username and password for now. You need to paste the public key into the file ~/.ssh/authorized_keys (in a single line).
mkdir ~/.sshsudo chmod 700 ~/.sshsudo nano ~/.ssh/authorized_keys
Set the permissions of that file, so it’s only readable/writable by that user.
sudo chmod 600 ~/.ssh/authorized_keys
3. Attach the private key in the new Session in PuTTY.
If you’re still connected to your server, disconnect/close PuTTY and open a fresh instance.
Enter the IP address or your server name, Give the name you want in the Saved Sessions, and then click on Save.
4. Make the selections for SSH authentication, then Authentication methods, and finally click Browse.
5. Find the private key that you previously saved.
6. Go back to Session and click the Save button.
You’ve attached your private key to your IP or host profile/saved session.
Your First PuTTY SSH Key Login
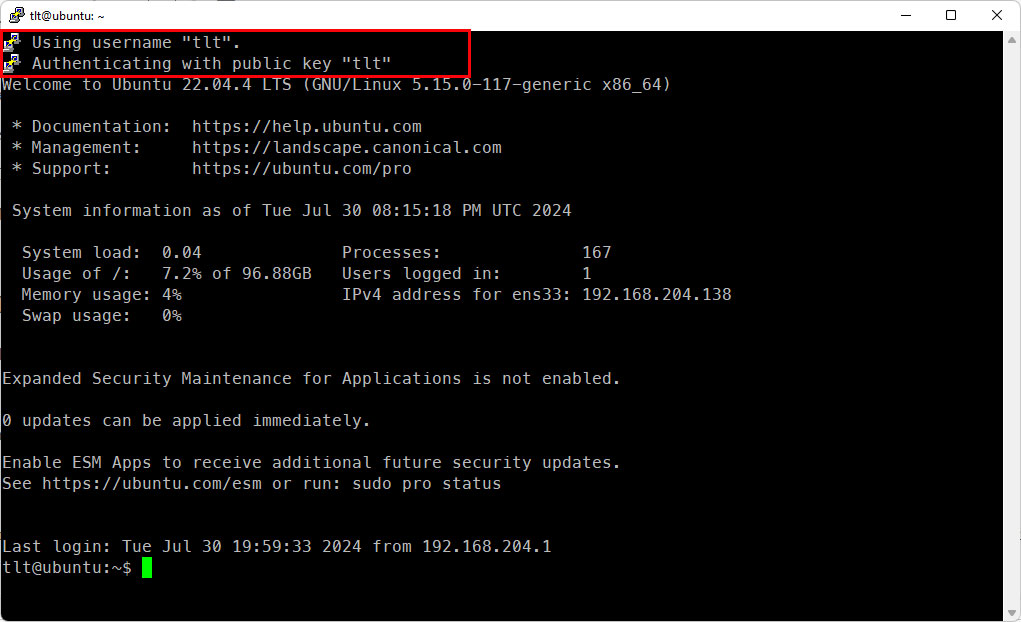
Everything is ready for you to log in. Make sure host.example.com is selected in the Saved Sessions and click the Open button.

If you set up a passphrase, you’ll be prompted for it. Otherwise, it will log you in without prompting for the password.
Conclusion
This is the way how to create SSH keys with PuTTY on Windows. Now, you can use PuTTY SSH keys to connect to your server. While not having a password to log in is convenient, you’ll have heightened security with a PuTTY key and a passphrase. You are on your way to a more secure server.
Feel free to share your experiences or ask questions in the comments below!
